Short version: if you already have an STL and you keep rebuilding the same mold box by hand, formwork software can save time. It will not magically turn every model into a perfect silicone mold. It can remove a boring chunk of CAD work and make the result easier to inspect before you print anything.
That distinction matters. A lot of 3D-printing and casting conversations get messy because people use "mold", "master", "form", and "formwork" for different things. Here we are talking about printable formwork: the rigid parts that hold the silicone while it cures. The finished silicone mold is what you get later, after printing, assembly, sealing, pouring, curing, and demolding.
CraftMold sits in that middle step. You bring a suitable STL. It helps build the bottom, wall sections, preview, and export files for the slicer.
What Problem This Actually Solves
The annoying part is not making one box once. Anyone who can use CAD can draw a rough box around a model.
The annoying part is doing it again and again:
- deciding which side is the bottom;
- leaving enough silicone around the master;
- not wasting half a cup of silicone on empty space;
- splitting the walls so the form can open;
- keeping the printed parts thick enough;
- exporting several files without missing one;
- checking everything again in the slicer.
If you do this for one small model, manual work is fine. If you do it for candles, figures, prototypes, test batches, or a shelf of slightly different masters, the repetitive part starts to hurt. That is the useful space for software.
It Is Not a Universal STL-to-Mold Button
The hard truth: the model still matters.
STL files do not know your casting plan. They do not reliably tell you the intended units. They do not tell you whether the part can release from silicone. They do not tell you whether the nice-looking detail on screen becomes a nasty undercut in real life.
Good first candidates are boring in a good way:
- one clear object;
- a usable flat bottom;
- no random loose shells;
- no deep locking undercuts;
- dimensions that make sense;
- a shape that can actually be pulled from a flexible mold.
Bad candidates are the ones that look cool but fight the process: hooks, handles, long thin side features, deep cavities, broken meshes, or anything where you are already thinking "I hope silicone just stretches enough." Sometimes it will. Sometimes you destroy the mold on the first pull.
Software can help organize the formwork. It cannot make a bad release direction good.
The Bottom Plane Is Not Just Orientation
In CraftMold, choosing the bottom plane is a real manufacturing choice, not just a camera view.
That plane becomes the base of the form. The bottom part, wall height, model placement, and generated sections are all built from that decision. Pick the wrong side and the form may still look like something happened, but the result can be awkward to assemble or useless for pouring.
Before building, rotate the model and ask the boring questions:
- Would this side actually sit on the table?
- Is this the side I want at the bottom of the silicone form?
- Can I pour around this without trapping the master?
- Will the wall sections have a sane way to open?
This is the kind of step that sounds obvious until you skip it once.
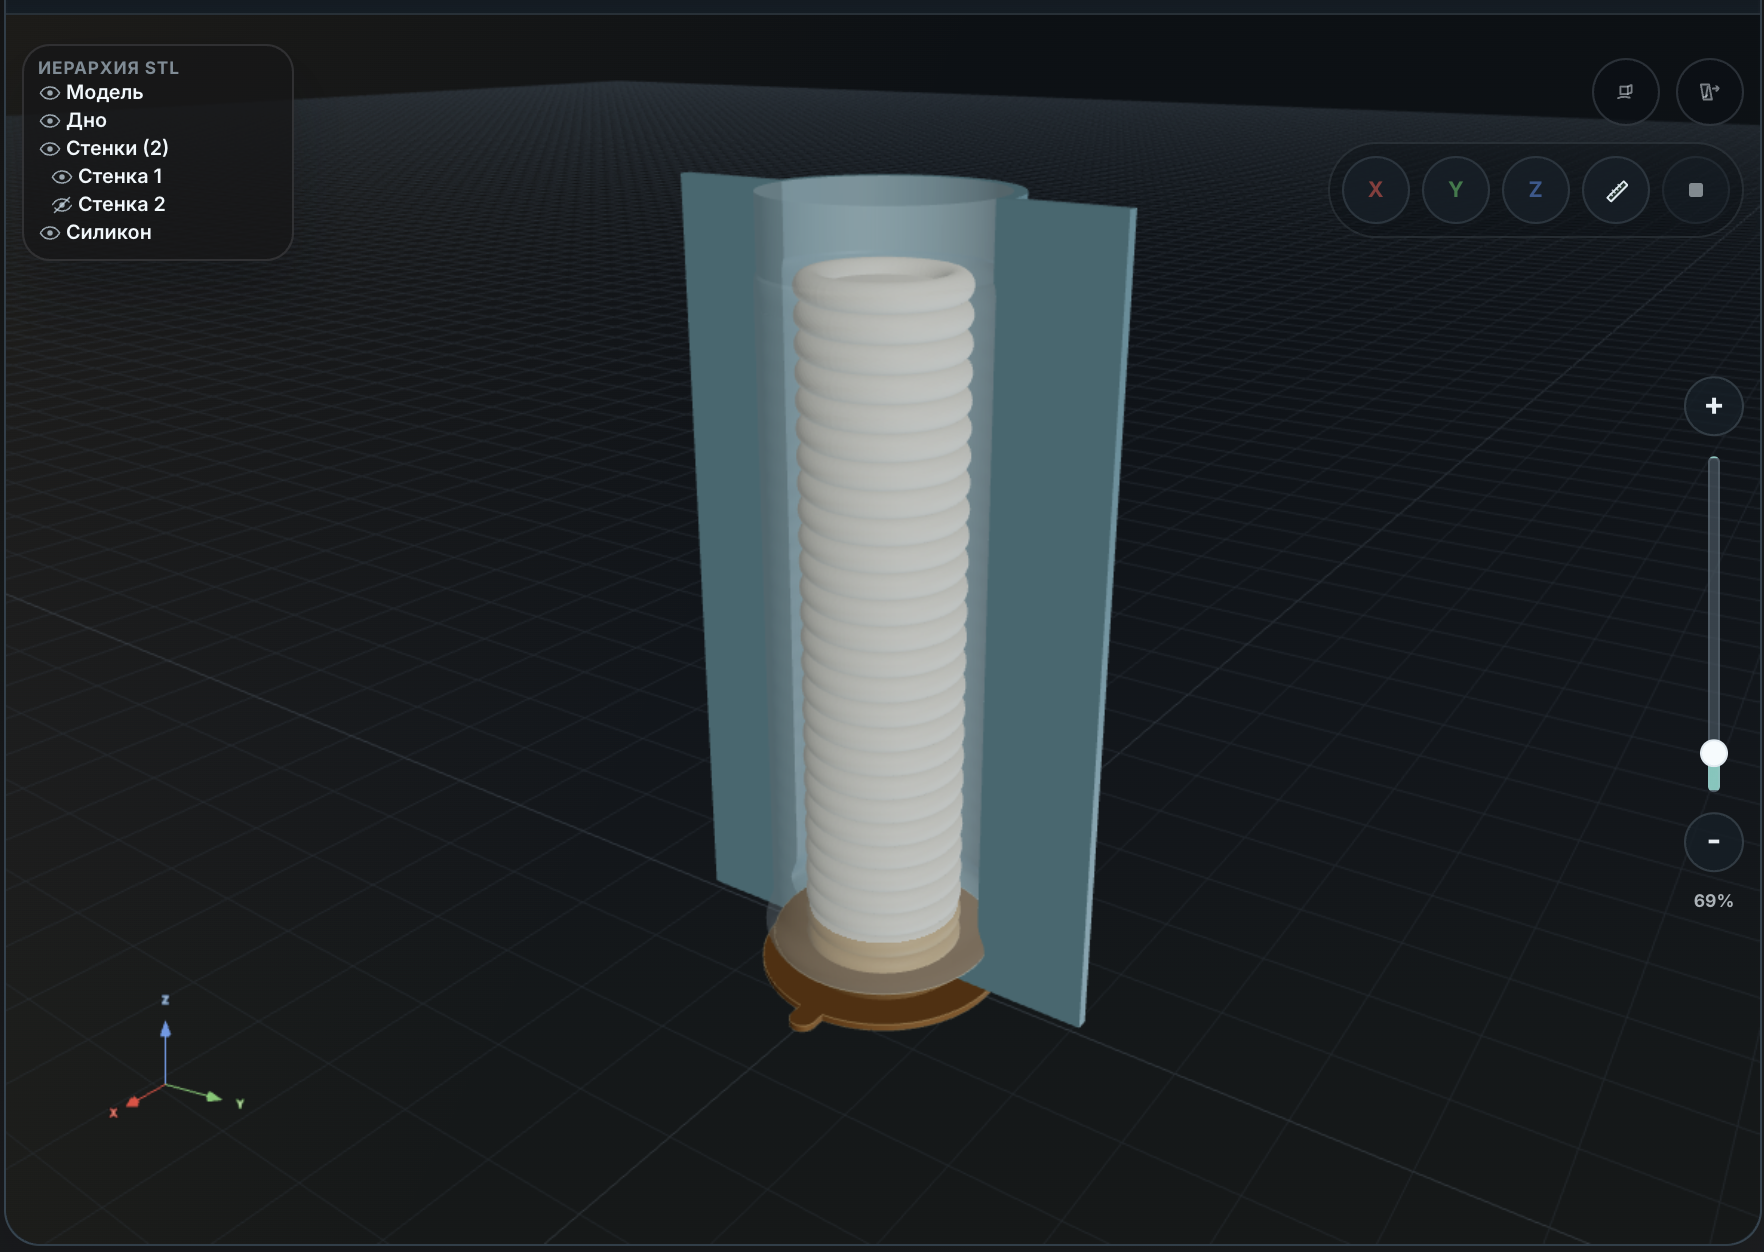
What CraftMold Generates
The intended output is a printable setup, not a finished casting process.
You upload the STL, choose the working bottom plane, set a few parameters, and inspect the generated formwork. The important parameters are usually:
- silicone thickness around the master;
- printed wall thickness;
- bottom thickness;
- number of wall sections;
- the lower interface between bottom and walls.
For a small candle or a simple figure, this can be a compact two-section form. For a larger master or a more aggressive shape, you need more margin and more checking. There is no single magic wall thickness that is correct for every printer, filament, silicone, and model.
A full walkthrough with a small candle STL is here:
Silicone Mold Formwork from an STL: Candle Example
What You Still Need to Check
This is the part people usually learn the slow way.
After generation, do not jump straight to printing. Open the result and check it like you expect it to fail somewhere:
- Are the walls intersecting the source STL?
- Are there thin spots that will print badly?
- Does the bottom look stiff enough?
- Can the sections separate after silicone cures?
- Does the slicer show the expected scale?
- Are the number of perimeters and first layer reasonable?
Layer lines also matter. If a printed master or printed formwork surface touches the final casting surface, those lines may transfer. Sometimes that is fine. Sometimes you need sanding, filler primer, coating, or a better master.
And if resin printing is involved, test compatibility before committing a real pour. Some resin prints can inhibit platinum-cure silicone if they are not cleaned, post-cured, aged, or sealed properly. That is not a software bug. That is chemistry.
Silicone Usage Is Part of the Design
A rectangular box is easy, but it can waste silicone. Tighter formwork can reduce dead volume, but going too thin is its own failure mode. A mold that saves 20 grams and tears on demolding did not save anything.
The practical check is simple:
- estimate the pour volume;
- subtract the master volume;
- convert the remaining volume using your silicone density;
- leave enough material for strength, not just for coverage.
CraftMold has a calculator for this part:
Silicone Consumption Calculator
When This Is Worth Using
Use formwork software when the STL is already close to something castable and the manual CAD work is the boring bottleneck.
It makes sense for:
- small candles;
- simple figures;
- decorative parts;
- prototype masters;
- small repeat batches;
- models with a clear flat base.
It is probably the wrong first move for:
- complex multi-part mold design;
- models with no usable bottom;
- hard undercuts you have not solved;
- unknown scale;
- resin masters that have not been compatibility-tested;
- anything where the casting plan is still vague.
The honest pitch is not "upload any STL and get a perfect mold." The honest pitch is: if your model is suitable, CraftMold can get you from STL to printable formwork faster, so you can spend more time checking the mold-making decisions that actually matter.
Try It on Your STL
If your model has a clear bottom and sensible dimensions, upload the STL, choose the bottom plane, set the thicknesses, and inspect the generated formwork before printing.
Access is currently available by promo code.